One of the first cameras I owned was an Ensign Selfix 120. And I’ve tried lots of 120s since then; Rolleiflex, Hasselblad, Kodak autograph. None with much success.
Excuses:
- I’m no good at guessing exposures
- Turns out my old Weston light meter is unreliable
- Gummy shutters (my Rolleis are long overdue servicing)
- Light leaks (the Autograph, but then it is circa 1920)
I wanted a new toy, so I decided to give 120 another chance.
Hasselbald, Mamiya, Contax, Pentax all too expensive. I wanted square format, something solid, with a decent range of decent lenses, and not too ancient.
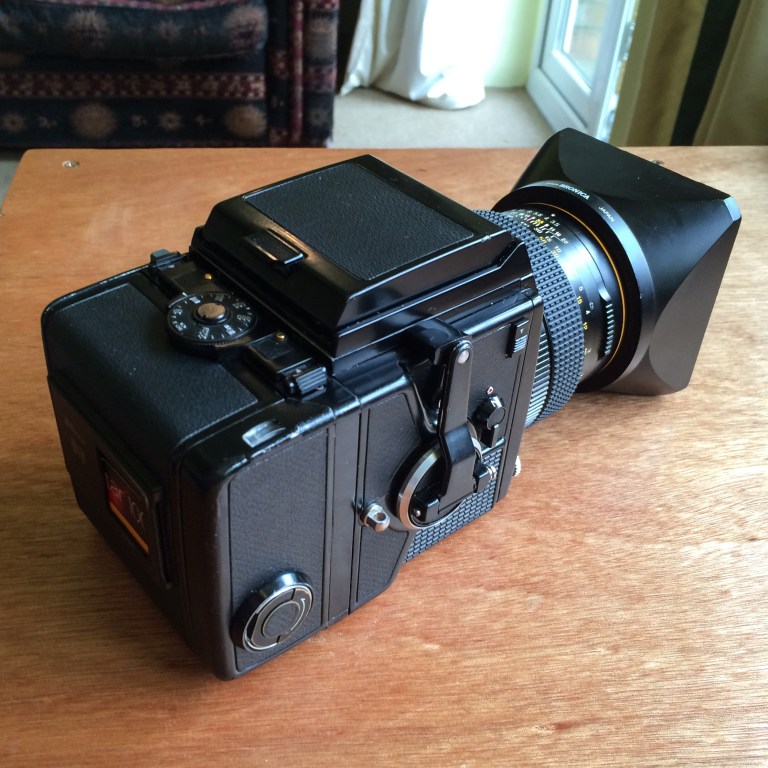
So I got a Bronica SQ-A.

Bronica SQ-A with speed grip
Bronica SQ-A without speed grip.
Modularity is a good thing
The SQ-A is a modular system. And that’s a good thing, because when some of the components don’t work you can swap them out. Some of the components won’t work and you will need to swap them out.
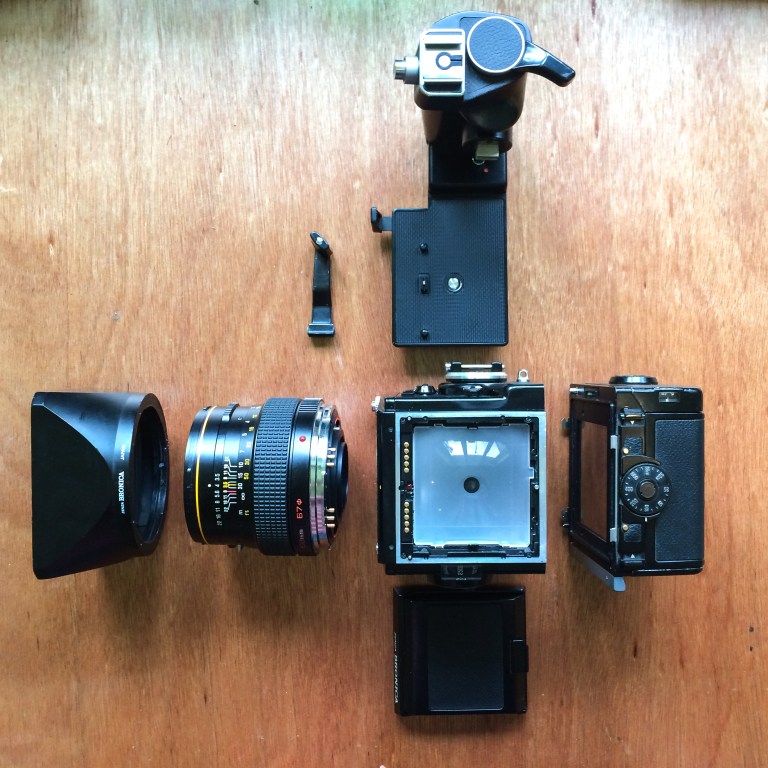
SQ-A exploded
I’ve got one body where the winder slips. Normally the winder stops when shutter is cocked and the film is advanced. On my dodgy SQ-A body you can keep turning the winder. This locks the shutter up and you have to faff around trying to cock the shutter in multiple exposure mode. Fortunately you can get reasonably cheap bodies and now I’ve got one that works.
And one of my two lenses (an 80mm 2.8) has a dodgy shutter coupling. Cranking the winder cocks the shutter, which is in the lens. On my dodgy lens this only works every other time you wind on; again much faffing getting it cocked in multiple exposure mode.
Are Bronica’s unreliable? In my experience, yes, but then any old camera is. I’ve had Leica’s, Contaxes and Rolleiflexes go wrong. These old cameras are complex; they all need mending now and again.
In use
Once you’ve got a set of parts that work, using the camera is a joy.
1: Load your film
Easy as long as you get the film the right way around. Thread the film, close and mount the back, wind it on until it stops automatically at the first frame. The shutter is cocked and you are ready to go.
The film back is detachable. Thanks to interlocks, you can’t take a back off the camera without a darkslide in it.
With the darkslide in, you can take the back off even when there’s a film in it. The back knows whether the film is wound on or not, so you can swap backs while shooting without ever taking an accidental double exposure or wasting a frame. Clever.
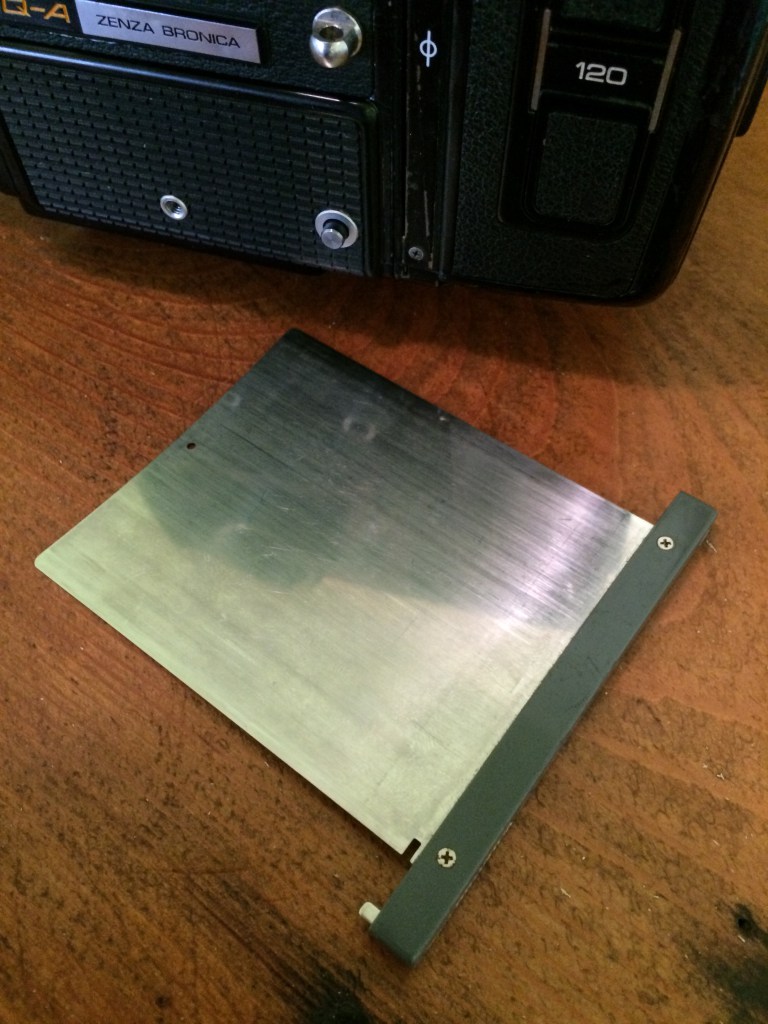
The darkslide
2: Think about what you are going to photograph
With the 6×6 format you get 12 shots on a roll of 120 film. A roll costs around £5 to buy and £12 to process. Gives you pause for thought.
That aside, there’s something about the way this camera feels and works that begs you to slow down and think before you even start taking the photo. Curiously, since getting it I’ve slowed down using my digital cameras also.
3: Measure and set the exposure
My SQA has no meter. You can get a metered prism finder, but I like the waist-level finder.
I have used a light meter, but I’ve yet to find one that’s accurate. I recently realised (duh) that I have a perfectly good solution; my Ricoh GR. Set it to manual and it’s like having a light meter with a built in preview. Set the ISO to match your film, set the aperture and shutter, and there on the live view is the end result. Tweak away until you get the exposure you want.
Then transfer the settings to the Bronica. Close is good enough – any film other than transparency has miles of leeway. That said, don’t underexpose (as is tempting with slow films and slow lenses).
4: Compose and focus
I love the waist-level viewfinder. The world swims around in it. The camera is really nice to hold. The speed grip makes it easier to lug the camera around, but it’s more comfortable to shoot without it. And I prefer the crank to the thumb winder. The speed grip probably makes more sense with an eye-level finder.
Focussing is manual, of course. There’s a flip-up magnifier and a split ring to help get the focus spot on – which it needs to be; depth of field with a large film area is razor thin at wider apertures.
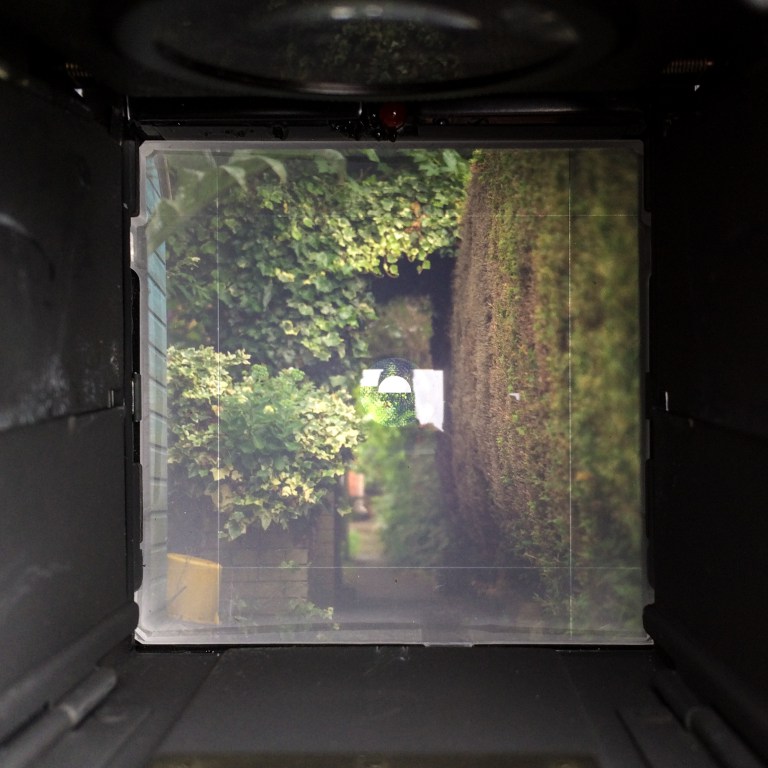
Bronica viewfinder
5: Press the shutter button
Press the shutter button and there’s a clunk as the mirror swings up. The finder goes opaque. You have to wind the film on and cock the shutter before the mirror swings down and you can use the finder again.
6: Unload the film, send it off, and wait
None of your one hour processing here. The film goes off in an envelope. What’s nice though is that labs deliver scans over the interweb, so you only have to wait for the film to get there, be processed and scanned. Not for it to come back in the post.
Results
Far better than anything I’ve got out of any other 120 camera.

Bronica SQ-A | 150mm | f3.5 |1/125
The pic above is down to using the body with a slipping winder. I forgot I put the camera on multiple exposure while I was trying to get the shutter to cock.

Bronica SQ-A | 150mm | f3.5 |1/125
The picture above is exactly what I was hoping for. All the bokeh, sharp but a more soulful sharpness than digital. Not as close as I’d like – the 150mm lens has a minimum focussing distance of nearly a mile. These were taken on Kodak Extar 100. Super-fine grain (none detectable) and vivid colours (skin comes out a bit on the magenta side).
Does it make sense?
The camera (cameras, given the number of bodies and other bits you’ll need), the film, the processing; none of it makes sense when I’ve got plenty of other cameras that give you much more for your money.
I could get something super detailed with my 1DS Mark III and all the bokeh to boot with my 85mm 1.2. And for most purposes, landscape and panoramas certainly the Canon is the right tool. For street photography my Ricoh digital and film cameras can’t be beaten.
For portraits though, I think this format, this camera, is the thing.
It is very satisfying to use, and the results are satisfying. The perfect toy for the camera and photography lover.
Links
Bronica SQ-A manual: http://www.cameramanuals.org/bronica/bronica_sq-a.pdf
Mr Zenza’s Rolls Royce – Bronica history:http://www.japanexposures.com/2010/05/20/mr-zenzas-rolls-royce/
Technical stuff about the lenses and a guide to the Polarid back:http://www.buonaluce.com/
And the best bargain medium format camera is:http://theonlinephotographer.typepad.com/the_online_photographer/2012/10/bargain-medium-format.html
I used to run around in the late 1980s with an SQA and a T90. I used the T90 as a spot meter. On tricky scenes I would point it at foliage and then with a set of memorized rules of thumb adjust the exposure in my head and then set it on the SQA.
I so desperately wished they would release digital backs for the SQA and then Bronica went under.
I recently came across a Zenzanon 150mm S I’d forgotten I had and am now using it with my X-T1.
Luckily I saved a bit of money on the mount adapter by noticing they come in two parts even though they’re sold as one unit: SQ to EOS and then EOS to whatever. The SQ to M43 was £30 instead of £80 to £120 for other mounts. I had an EOS to FD already.
They look ridiculous paired together but the images are rich and dense. I havent yet tried stitching photos together with this lens to get a more medium format field of view.
“Accidental double exposure”