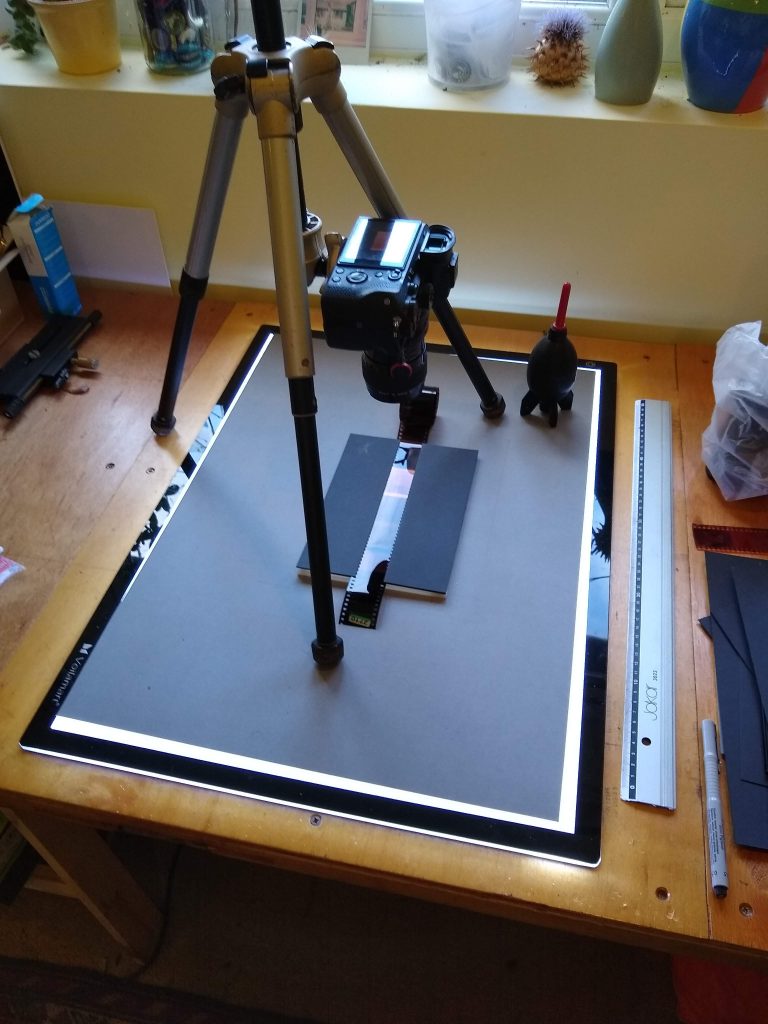
This is my set up and process for ‘scanning’ negatives. That is making positive, digital copies of pictures from film negatives.
The usual way of doing this is using a scanner. But – unless you have a zillion-pound, wet-mount drum scanner – you’ll probably be using a flatbed scanner. I haven’t had any joy getting good results out of a flatbed.
I get much better results using a digital camera, a tripod, a light pad and a homemade negative holder. I process the scans in Lightroom and Photoshop. (They are photos of negatives, not scans as such, but I’m going to call them scans.)
The camera
Quality and resolution is what you are after. The more of either you can get, the more flexibility you’ll have when it comes to processing the scans.
And you’ll need a macro lens. I use a Sony A7RII with an ancient Canon FD 50mm 3.5 macro.
The tripod
Any tripod will do. I’ve used a massive Manfroto tripod with a proper macro plate (makes fine focus adjustment easy), but the travel tripod I’m using in the pic above works just as well. As long as you can point the camera downwards and it’s stable, you are good.
The light pad
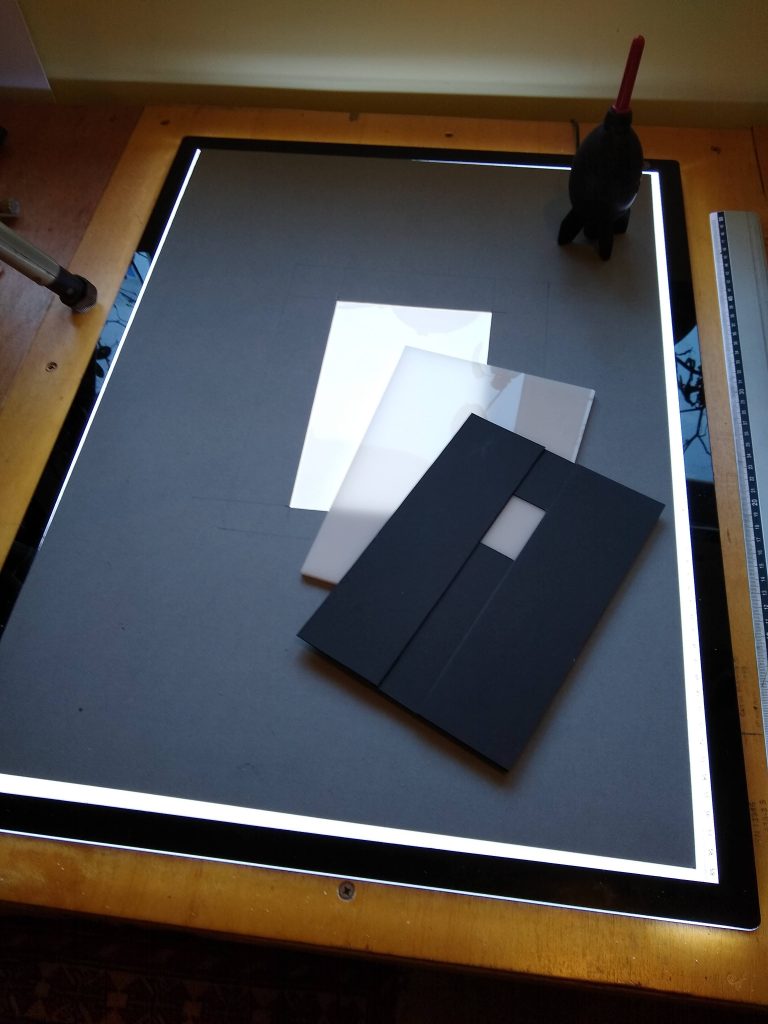
You want white light and a scratch-free surface. I use an A2 light pad. I mask off most of it with a piece of card. You only want light to shine through the negative. If there’s light around the negative you’ll get odd colour casts and reflections. If you’ve got orange edges to your scans, you probably haven’t masked the edges of the negative properly.
Scanning is best done at night, with all other lights off, to reduce reflections.
The surface of my light pad is scratched, and those scratches show up in scans. So I put a piece of opaque perspex, that isn’t scratched, between the light box and the negative.
The negative holder
The light should shine through the negative, not around it or on it. So a negative holder that masks the edges of the film is important.
The holder also keeps the negative flat. Kodak film lays nice and flat anyway, but some stock (Lomo, for example) is really curly, so needs holding flat. If the film isn’t flat, the scan will be distorted, and you risk reflections.
Finally, the holder keeps the negative off the surface of the light pad. If the film touches there’s a risk of Newton rings, rainbow-like artefacts, on the scan.

I’ve made my own negative holder from three layers of card. The bottom layer has the aperture that lets the light shine through the picture. The aperture is slightly larger than the image size because I like to see the edge of the picture and a hint of sprocket hole.
The middle layer is two strips of card 35mm apart. This is the track the film slides through.
The top layer is another two card strips, the same width apart as the aperture. These strips hold the film flat and in the track.
It’s really quick to slide an uncut film through the holder, photographing each frame.
I’ve made 120 and 135 panoramic negative holders in the same way. I’m working on a 3D printed version, but it’s proving hard to get the dimensions right as the material seems to shrink.
Dust and scratches
I use a blower and wear cotton gloves. But I still get dust and scratches. It’s the nature of film. They are easily fixed in processing though.
Processing the scans
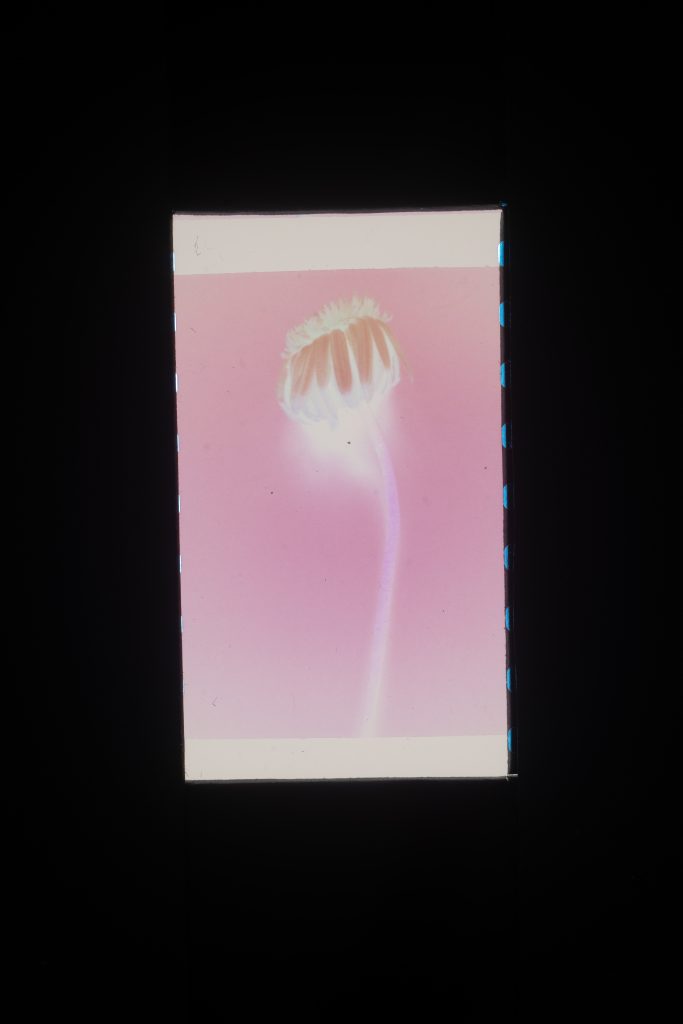
What you’ve got now is a picture of the negative. You need make it into a positive, clean it up (it will have dust on it) and crop it.
I use Lightroom with the Negative Lab Pro extension to make the positive and Photoshop to clean up the image.
You can make a positive from the image using curves and colour correction tools in Lightroom or Photoshop, but it’s a complete pain. The Negative Lab Pro plugin is brilliant at reversing images, and fixing colour issues. It’s absolutely worth the price.
Here’s my process:
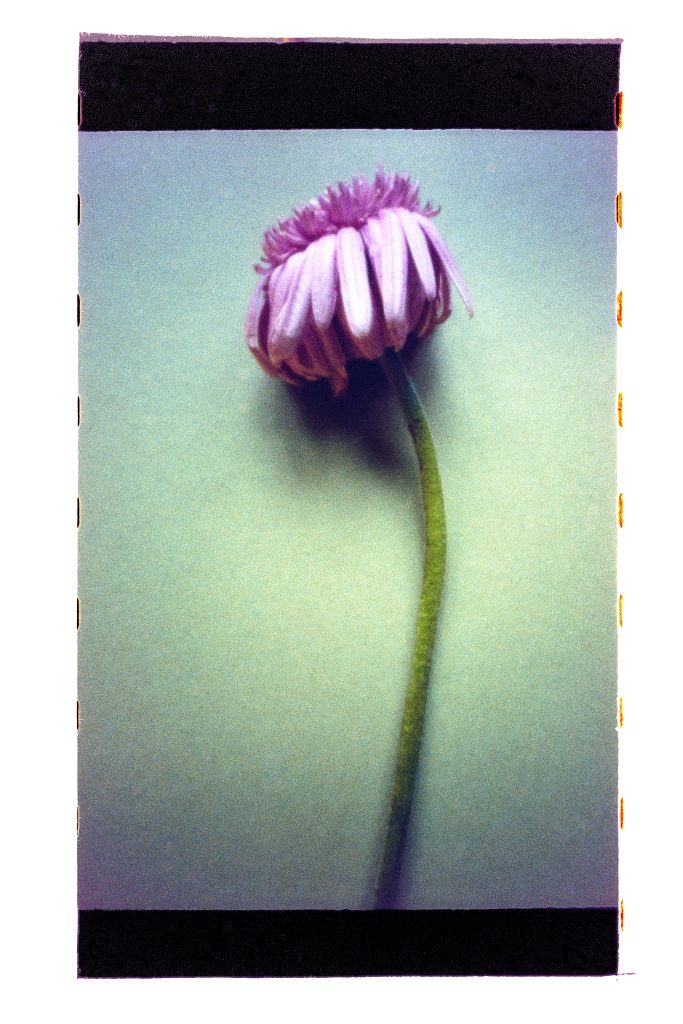
The original picture was taken with an Ondu 135 pinhole camera and Kodak ColorPlus 200 film.
The scan was done using a Sony A7RII and a Canon 50mm f3.5 macro lens.
1: Open the image in Lightroom.
2: Set the white balance by selecting the grey edge of the scan with the white balance eye dropper.
3: Straighten and true the image using ‘Transform/Guided’.
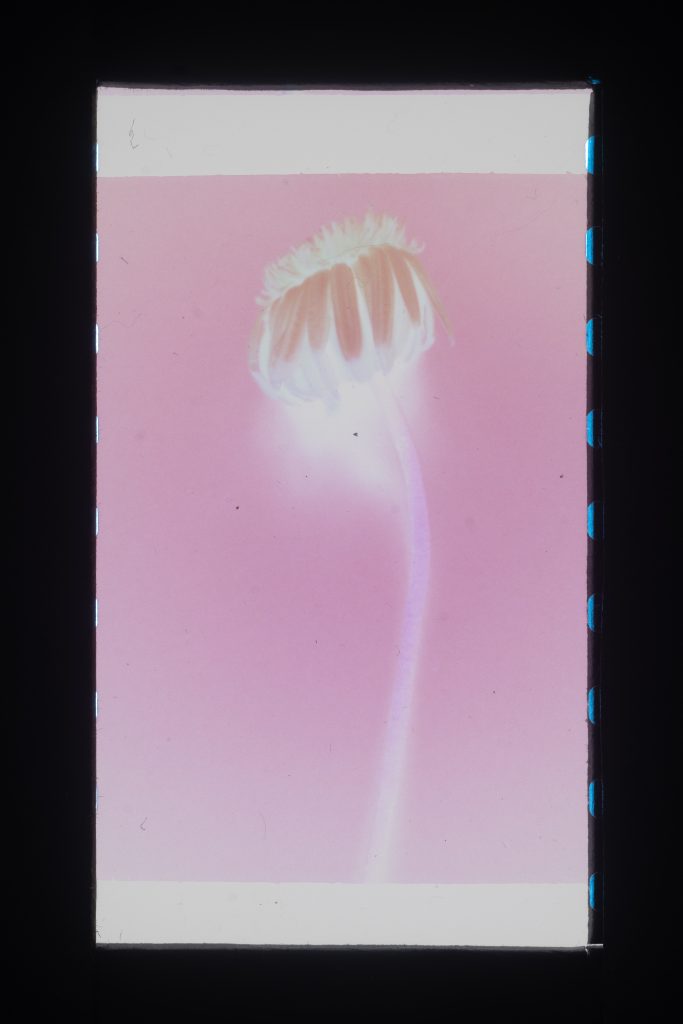
4: Use the crop tool to select the image area, with no border. Negative Lab Pro needs to work on the image alone.
5: Select ‘File/Plug in extras/Negative lab pro’ and reverse the image.
6: Adjust the image crop. I like white space around the picture showing the film edge. Yes I am a hipster. I do have a beard and I am wearing a checked shirt.
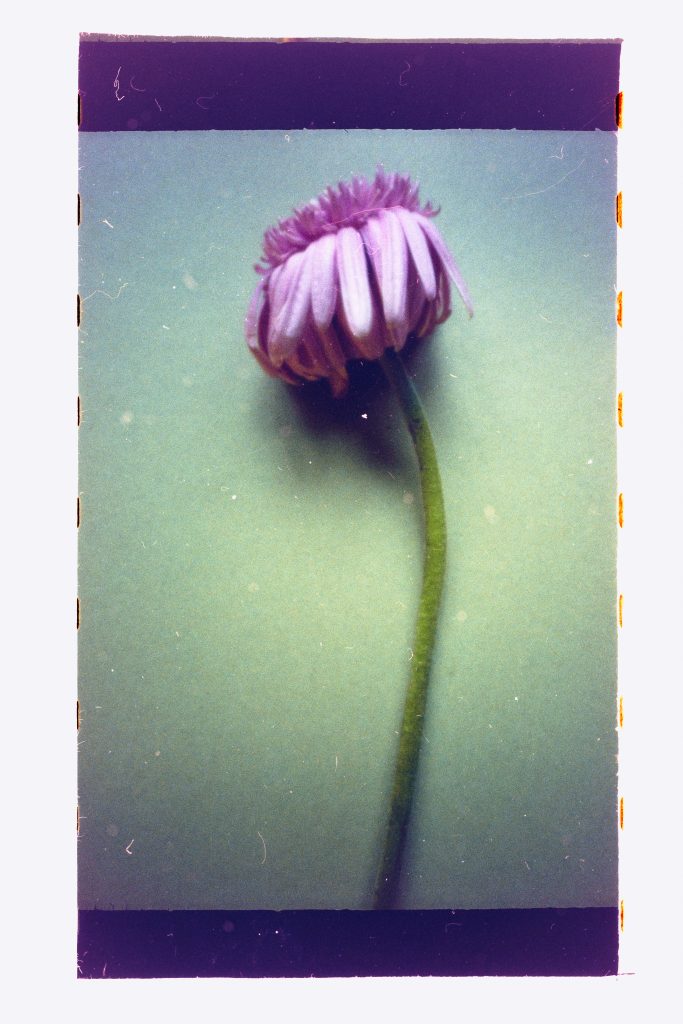
Now you’ve got a positive image. It needs some work though. Apart from the dust and scratches, the border isn’t pure white, and you may want to do some other Lightroom tweaks.
Don’t do that yet. Lightroom still thinks it’s a negative, so many of the adjustment tools are reversed, which makes editing a pain.
First open the image in Photoshop, fix the dust, then save back to Lightroom as a TIFF which you can edit normally.
7: Right click on the image in Lightroom and select ‘Edit in/Photoshop’.
8: In Photoshop, use the spot healing brush to fix dust and scratches. This can be a labour of love, but it’s worth doing. I let my eye wander, fixing the worst dust as I see it, then refining and refining. You may want to do more radical Photoshopping – fill your boots. I think images should be worked on. (As long as you’re not passing your pictures off as something they aren’t.)
9: Flatten, save and close the image. You’ve now got your clean image in Lightroom as a TIFF.
10: Lightroom adjustments will work the right way around now. So adjust your image to your heart’s content.
And voila, we’re done.
Scanning and processing scans can take a while, especially fixing dust and scratches (think of it as therapeutic and enjoy watching the image come to life), but I’ve found this method much quicker than flatbed scanning. And the results I’ve got are much better.