I’ve got quite a few Canon EF and FD lenses. When I bought a Sony A7 I also got Fotodiox FD and EF converters.
The first thing I did when the camera arrived was put my EF 50mm f1.4 on it. That was disappointing. Practically unusable AF. So I tried the FD 50mm 1.4 on it, and then I understood what the camera was for.
It is built for shooting with old manual lenses. You can get adaptors for M39 and M42 screw mount, Leica M, Nikon, Canon, even medium format lenses. That’s a world of lovely, characterful glass – some of it really cheap, almost all of it good value.
(Yes, you can use EF lenses in manual focus mode, which is what I tried next… but without the aperture ring, it isn’t quite the same. Also, the EF 50mm f1.4 isn’t as good as the FD 50mm f1.4.)

Canon FD 20mm f2.8 on a Sony A7R
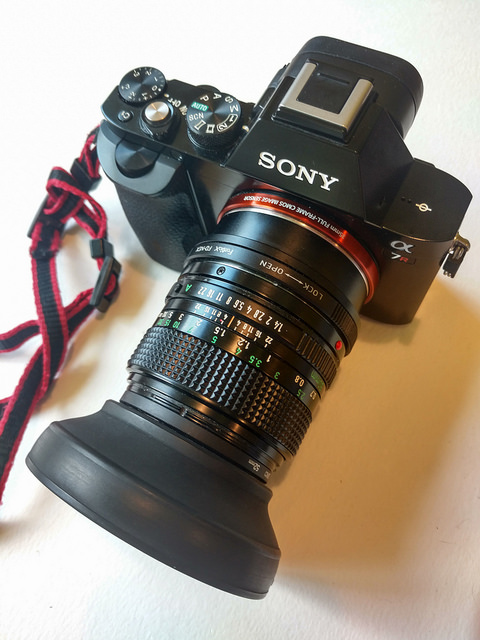
Canon FD 50mm f1.4 on a Sony A7R
Focus peeking makes focussing a breeze, much easier that using an optical viewfinder. I can even get my EF 85mm at f1.2 focused on the right place using manual focussing.
And the electronic viewfinder means that you can see what you are actually going to get – not just the composition, but the exposure and the depth of field. As you adjust the aperture, you see the actual effect.
There’s just something about this camera and a manual lens that is right.
There are a few articles out there on using the A7 with a manual lens, but they don’t quite match what I do, so… here’s what I do
Camera setup
First, get the camera set up:
With FD (and other classic lenses) the camera has no control over the aperture, so you have to set that yourself.
- Enable ‘release without lens’ in the camera’s settings
- Set your lens/adaptor so the aperture closes when you set it on the lens
- Turn on focus peeking
Manual mode
Why manual mode? Because it sort of feels right with this camera and a manual lens.
- Put the camera in manual mode
- Set the ISO
- Focus
- Adjust the shutter and apperture until the exposure is right – you can tell by looking at the indicator on the exposure scale in the viewfinder (or looking at the MM indicator on the screen, but I prefer the scale)
- Check the focus
- Is the image OK in the finder/screen? You may want to shift the exposure
- Take the picture
Aperture priority
Why aperture priority? Becuse it’s quick, and the aperture is generally what I’m after controlling.
- Put the camera in aperture priority mode
- Set the ISO
- Set the aperture on the lens, the camera will sort out the shutter speed for you
- Focus
- Is the image OK in the finder/screen? You may want to shift the exposure
- Take the picture
Auto ISO
You can use auto ISO with either of the above. Speeds things up. I tend not to – I like to make a conscious decision about ISO.
Full auto with EF lenses
If you are using an EF lens you can set the camera to anything you like (unlike an FD lens, the camera has control of the aperture) and let it get on with it. With the right adaptor you can get auto focus too. But it’s not the same.

Hal, Canon FD 50mm f1.4