Here are the pictures I made when I demonstrated photo stitching (and stereographic projections) to the Worcester Photography Salon. And a re-cap.
I took three rows of 9 pictures, each row covering 360 degrees. The rows covered (broadly) the ceiling, room and floor.
The pictures were taken using a Canon 1DS mark 3. The lens was a Canon EF 24mm f2.8.
Normally I’d use f11 for depth of focus and ISO 100 for maximum quality. But the room was really dark so I used an f4 aperture and ISO 1250.
The camera was set to evaluative metering. I used manual focus for the top row (auto focus wouldn’t work on the dark ceiling) and auto focus for the middle and bottom rows.
The camera was on a Manfrotto 055 tripod with a Nodal Ninja panoramic head.
I imported the 27 pictures into Adobe Lightroom where I reduced the exposure on the top row by a bit over 2 stops – the camera had tried to make the black ceiling a neutral grey.
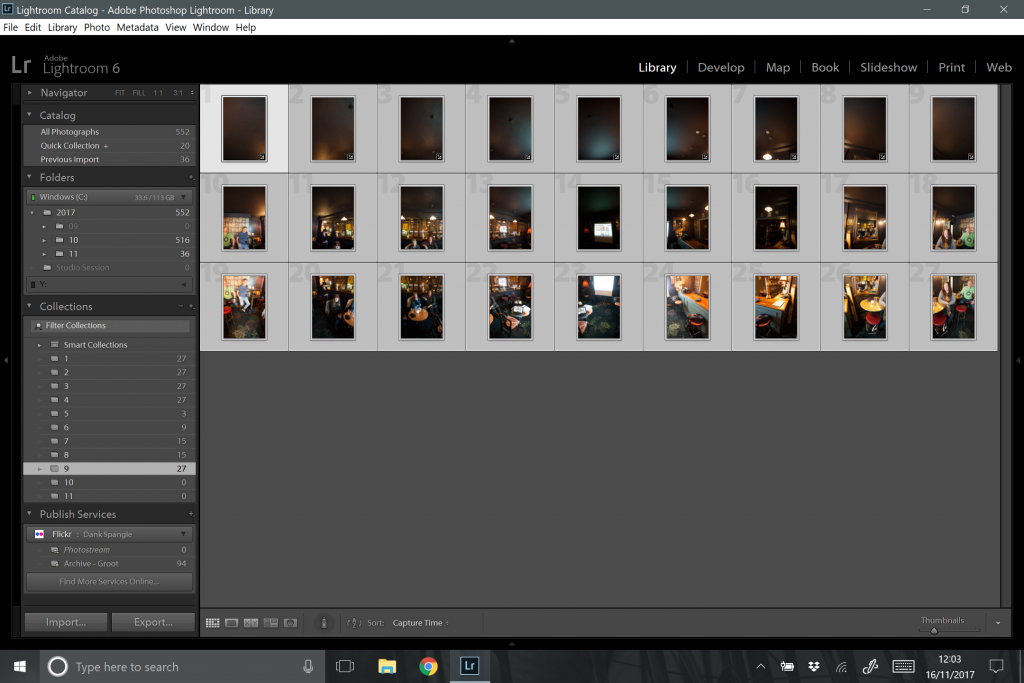
I exported the images from Lightroom to a folder on my PC. I used reduced size and quality on the evening to speed things up. The pictures here use full size, full quality exports.
I imported the images into Microsoft ICE (Image Composite Editor). You can download the program here: https://www.microsoft.com/en-us/research/product/computational-photography-applications/image-composite-editor/ .

I set the layout to 3 rows of 9 images, zigzag order, 360 degree horizontal coverage, 22% horizontal overlap, 40% vertical overlap, 22% 360 seam and 22% search radius. I stitched the photos.
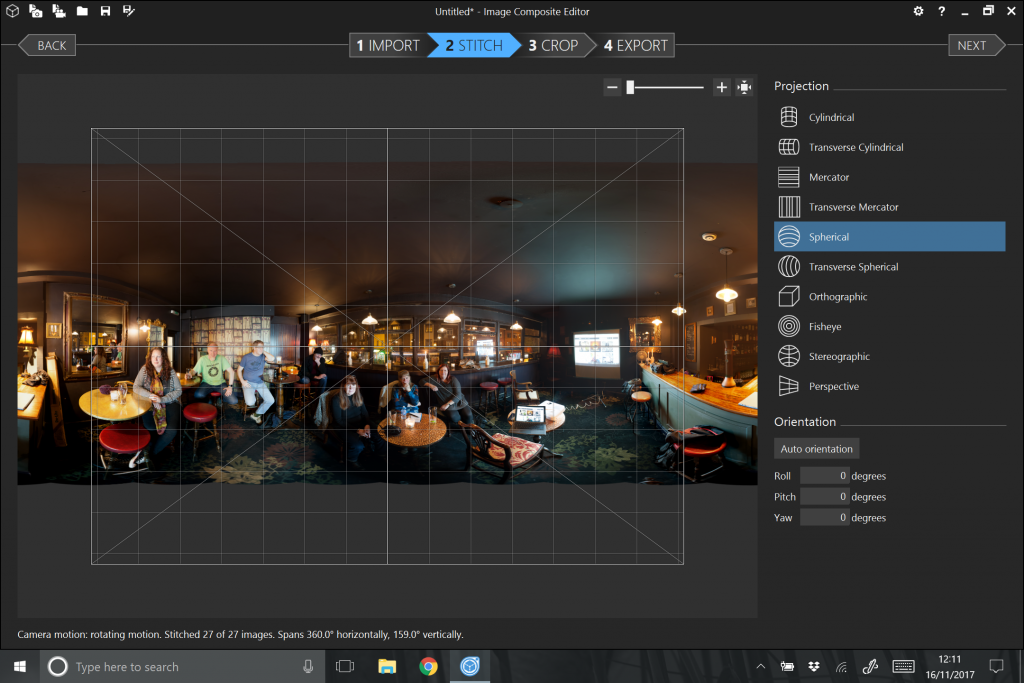
I rendered the result as one cylindrical and two stereographic projections. I chose a center point for each projection, chose a crop and exported the images at between 20 and 40% scale (depending on the projection and the crop).
See the full-sized image here. These are big images. Give your browser lots of time to download or display them, and lots of time to zoom in if you click magnify. You may want to right-click on these links and select ‘Download’ or ‘Save link as’ (depending on your browser) so you can open the image using another program.
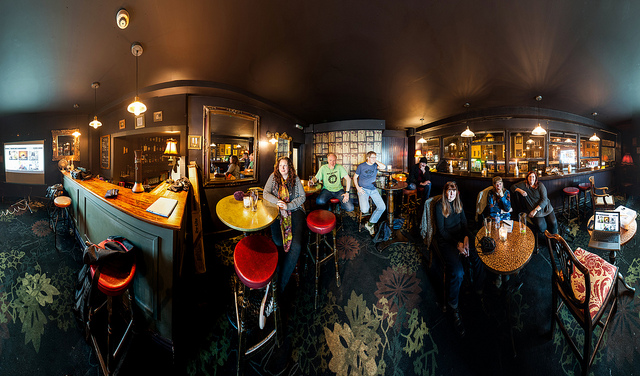
Look carefully and you’ll see a couple of stitching issues. Against the back wall, for example. However careful you are, it happens. It’s a common problem with close subjects where any little perspective error makes a big difference. And also with subjects that move between shots – people, animals, clouds, wind-blown trees.
See the full-sized image here. (See note on image size and downloading above.)
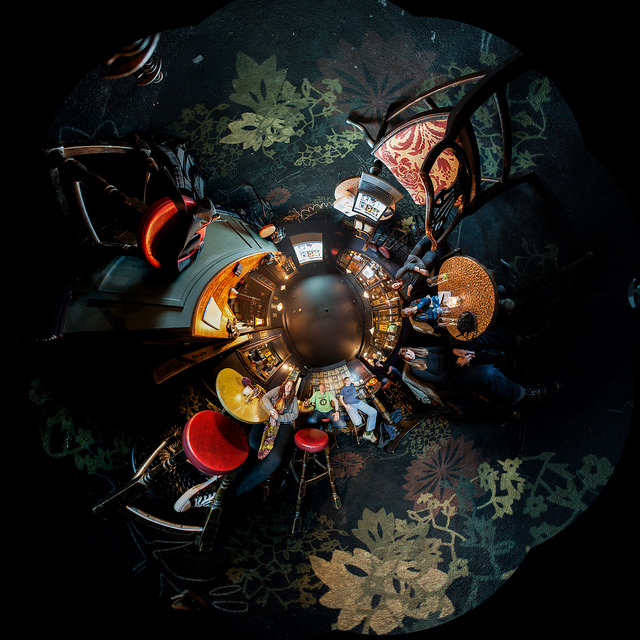
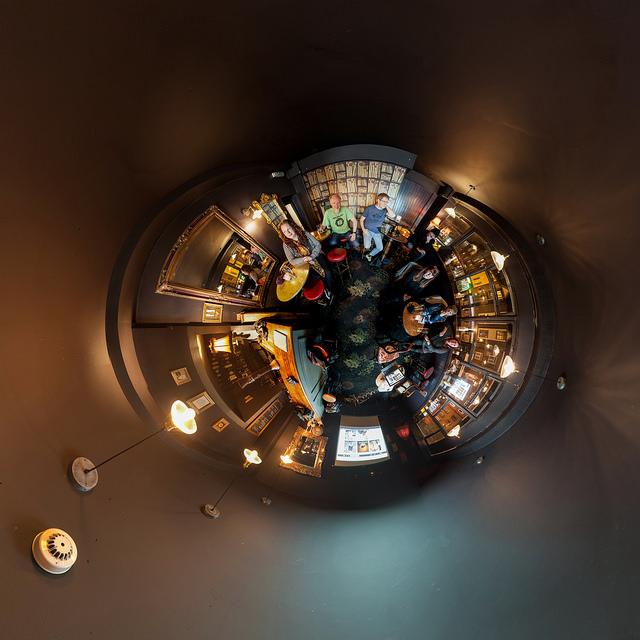
Note the tripod leg top left. I used spot removal to get rid of it from the cylindrical projection and planet. Not so easy here, it’s too big. I’d have to use Photoshop and that would be cheating.
See the full-sized image here. (See note on image size and downloading above.)
See also…
An article about making stereographic projections: https://blog.dankspangle.com/tunnel-vision-photo-stitching-and-stereographic-projections
A Flickr album with some of the projections that I’ve exhibited:https://www.flickr.com/photos/dank_spangle/albums/72157670463383921
If you know anyone who wants a giant picture of a weird tree: https://blog.dankspangle.com/buy-prints
Lots more of my pictures: http://www.flickr.com/photos/dank_spangle